Windlass
While there’s little doubt that the electric windlass has been a boon to cruisers the world over, it’s not foolproof. In most cases, malfunctions and outright failures can be attributed to installation flaws and incomplete or absent maintenance.
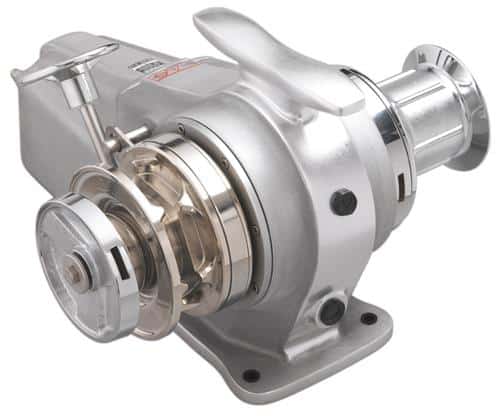
Aside from outright mechanical failure, the most common problems encountered with anchor windlasses are due to their placement. In many cases, what may look right simply doesn’t work. Thus, ensuring a fair lead between the windlass and an anchor roller on the bow is critical to avoid repeated snarls and jams. When you’re installing a new windlass or troubleshooting chronic snarling problems, it may be necessary to dry-fit the windlass to find the best lead or improve on the current one so that the anchor can be easily launched and retrieved without manual assistance from a crewmember on the bow.
Another common installation flaw involves stripper bars that are installed as a separate component. The job of this hardware is to peel chain from the rotating wildcat as the rode is retrieved. If the stripper isn’t properly placed or if it’s not secure, chain links can jam between the stripper and the wildcat.
The loads placed on windlasses are often significant, so the machinery needs to be securely through-bolted to the deck or anchor locker using the largest bolts that fit the mounting holes. There also needs to be a substantial backing plate or plates that are at least as large as the footprint of the windlass base. The backing plate should be an aluminum, stainless-steel, or GPO-3 fiberglass sheet of a thickness that’s dependent upon the size of the windlass.
An equally common installation fault involves wiring, both primary (the large cables that supply the windlass motor) and secondary (the smaller wiring connected to switches). Primary wiring should be sized so there’s preferably no more than a 3 percent voltage drop (although a drop of less than 10 percent is still within American Boat & Yacht Council guidelines) between the battery and windlass. The greater the voltage drop, the less efficient is the motor and the more heat that’s generated within the motor’s windings, with a consequent decrease in its lifespan.
A common and potentially disastrous wiring flaw involves placement of the fuse or circuit breaker, which must be located within 7 inches of the battery-not near the windlass or main electrical panel. Fuses are also required on secondary circuits carrying power to and from the windlass control switches. Remember that in the event of a short circuit, the fuse or circuit breaker protects the wiring rather than the windlass. If the windlass is equipped with the aforementioned fuse rather than an easily accessible circuit breaker, you should then include a disconnect switch, also easily accessible, in the circuit. You’d use this in the event that the windlass suffered a malfunction, say if water damaged a control switch and the windlass wouldn’t stop running.
Finally, use a piece of cutaway line to tie the bitter end of the rode to your sailboat. In the event of an emergency-say you’re dragging onto a lee shore or you’re about to be rundown-you can quickly reach the line and cut it to free your anchor.
Installation Tip:
Windlass installers and new- and used-boat buyers take note: To test a windlass installation for proper alignment, I’d recommend a minimum of 10 successful deployments and retrievals using a minimum of 50 feet of rode. If a jam occurs even once during this test sequence, a close investigation is warranted. Allow a little time between tests to prevent the windlass motor from overheating, although most motors have a thermal cutoff that will disable the motor until it cools.
For more information on windlass options, visit Imtra.com.


